
Do You Know How to Add Email Signatures?
Step-by-Step Instructions on How to Add your Email Signature in Outlook, Outlook.com, and Gmail
[youtube https://www.youtube.com/watch?v=n9ubHsx-eRo]Creating a signature that will leave a lasting impression at the end of an email is essential in today’s business world. However, users often struggle to know which font to use, how to make it stand out, but not make it too flashy, and so on.
If your company doesn’t specify a detailed way to create a signature, you may end up searching for professional email signature examples every time you change jobs, get a promotion, or feel the need to improve your current signature.
Let’s take a look at how to add a signature to the two most popular email platforms used today: Outlook and Gmail. We will also identify shortcuts and tips to make your experience using these email platforms easier and more effective.
Outlook
Frequently Used Keyboard Shortcuts
Knowing keyboard shortcuts can speed up the process of sending emails, formatting documents, and searching through the toolbar. Let’s look at some great shortcuts for Outlook.
Go to Home tab: Alt+H
New message: Ctrl+Shift+M
Send: Alt+S
Insert file: Alt+N, A, F
New task: Ctrl+Shift+K
Search: Ctrl+E Alt+H, R, P
Reply: Alt+H, R, P
Forward: Alt+H, F, W
Reply All: Alt+H, R, A
Copy: Ctrl+C or Ctrl+Insert
Send/Receive: Alt+S, S
Go to the calendar: Ctrl+2
Create appointment: Ctrl+Shift+A
Move to folder: Alt+H, M, V, select folder from list
Attachment SaveAs: Alt+JA, A, S
Navigating Through Outlook Using Shortcuts
Outlook has great shortcuts that can quickly allow you to hop around from email to calendar, and so on. Let’s look at these shortcuts.
Switch to Mail view: Ctrl+1
Switch to Calendar view: Ctrl+2
Switch to Contacts view: Ctrl+3
Switch to Tasks view: Ctrl+4
Switch to Notes: Ctrl+5
Switch to Folder list in the Folder pane: Ctrl+6
Switch to Shortcuts: Ctrl+7
Adding an Email Signature to the Desktop Version of Outlook
Step One: To begin, open up your Outlook email client and click on File.
Step Two: In the file window, click on Options.

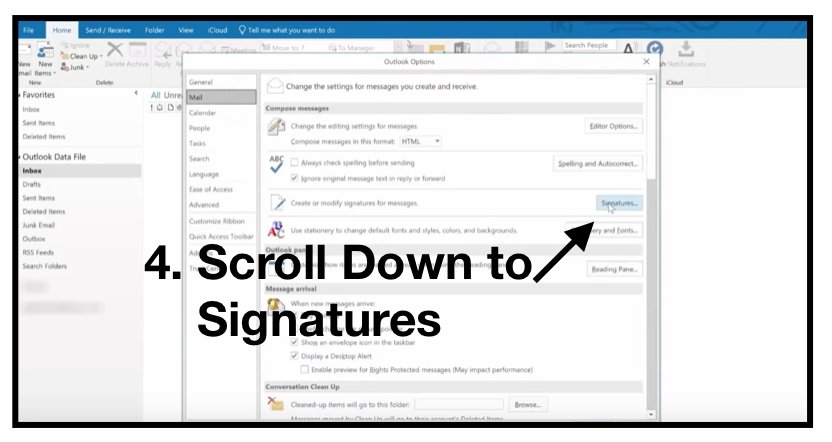
Step Three: When the Options window pops up, click on Mail.

Step Four: In the Mail section, scroll down to Signatures.
Step Five: When the Signature window opens, Click on New.

Step Six: In the Signature window, type in your signature and add a company logo if you desire.

Once you have completed this process, you can select New Email to see the signature you’ve created.
Adding an Email Signature to Outlook.com
If you are using Outlook.com instead of the desktop version of Outlook, adding a signature is a little different. Let’s look at how to add a signature to Outlook.com.
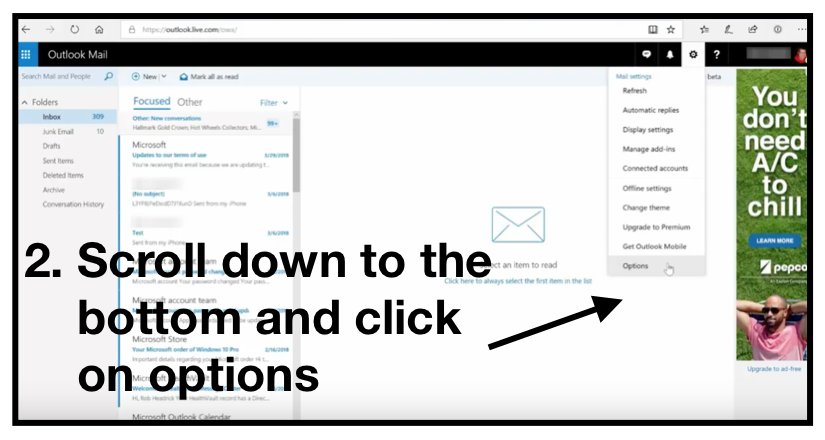
Step One: In your Outlook.com email, click the gear symbol in the top right corner.

Step Two: In the dropdown, scroll down to options, and click on it.
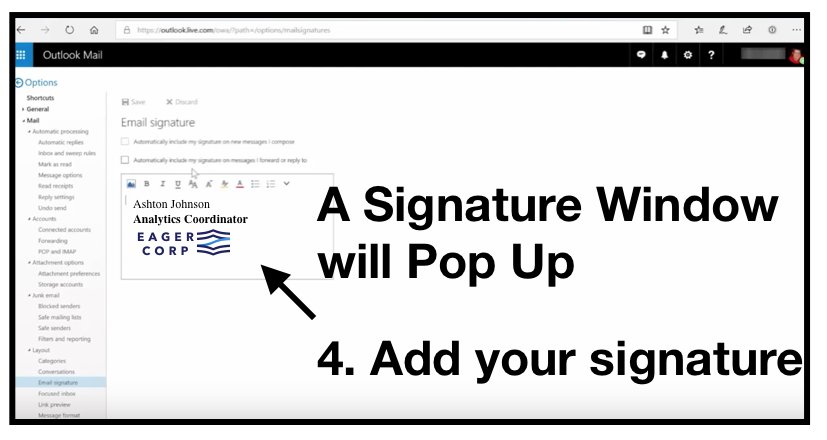
Step Three: In the Options window, scroll down to mail, and click on Signatures.

Step Four: When the Signature window appears, add your customized signature.
Step Five: After adding your signature, click the Save button.
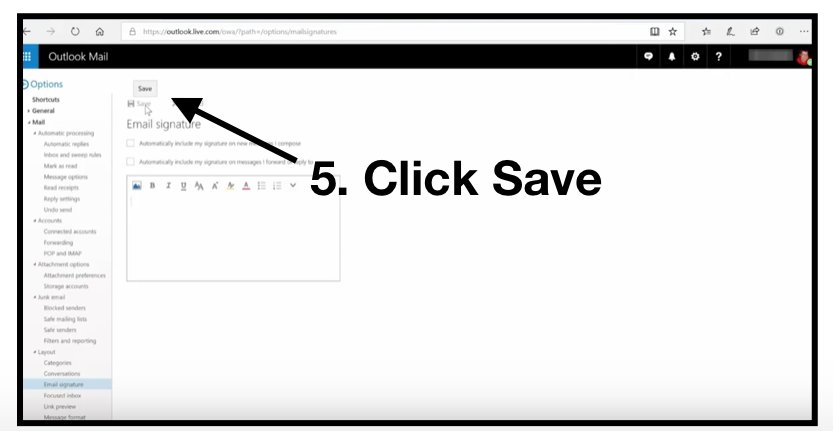
Once you have completed this process, you can select New Email to see the signature you created.
Gmail
Frequently Used Keyboard Shortcuts
As with Outlook, knowing keyboard shortcuts in Gmail can quicken your tasks of sending emails. However, with Gmail, you first need to turn the keyboard shortcuts on.
Turning on Keyboard Shortcuts in Gmail
First: In your Gmail window, click the gear symbol in the top right corner.
Second: Click on Settings.
Third: Scroll down to the “Keyboard Shortcuts” section.
Fourth: Select Keyboard Shortcuts On.
Last: At the bottom of the page, click Save Changes.
Gmail Shortcuts
Once you have your keyboard shortcuts turned on, here are some great shortcuts in Gmail:
Open keyboard shortcut help: Shift + ?
Select a series of messages: Shift
Select all unread messages: Shift + 8 + u
Archive selected messages: e
Mark selected messages as important: =
Compose Email: c
Undo last action: z
Search for messages: /
Go to tasks: g + k
Add a conversation to tasks: Shift + t
Reply: r
Reply all: a
Forward: f
Mark current messages unread: Shift + u
Mark selected message as important: =
Archive selected message: e
Jump to newer email: k
Jump to previous email: j
Jump to next message in email thread: n
Jump to the previous message in email thread: p
Jump back to inbox view: u
Insert link: Command + k
Insert numbered list: Command + Shift + 7
Insert bullet points: Command + Shift + 8
Bold/Italicize/Underline: Command + b/Command + l/Command + u
Remove formatting: Command + Control +
Send Email: Command + Enter
Adding an Email Signature to Gmail
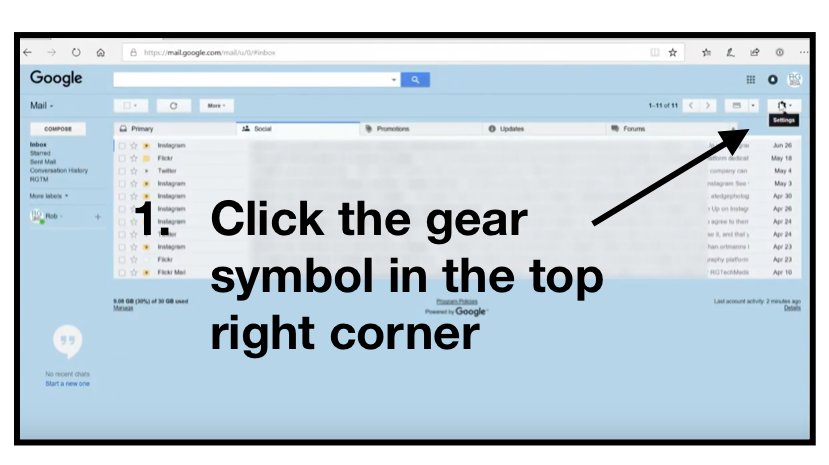
Step One: After you have signed in to your Gmail account, click the gear symbol in the top right corner.
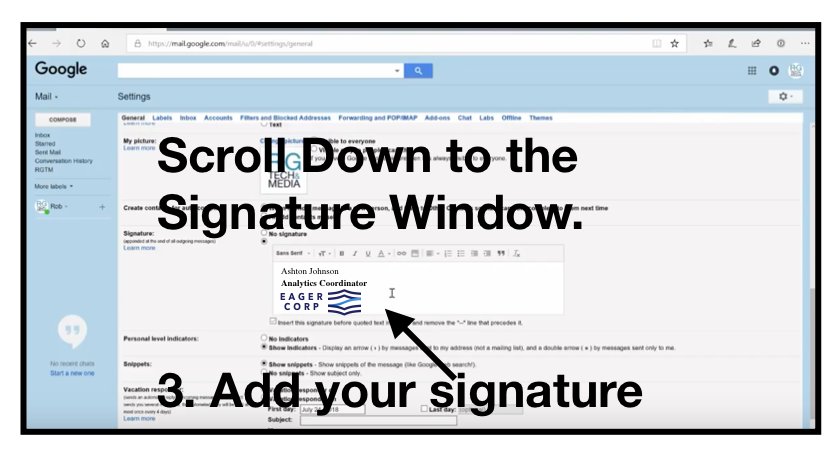
Step Two: In the drop down, click on Settings.

Step Three: In Settings, scroll down to the Signature window, and add your Signature.
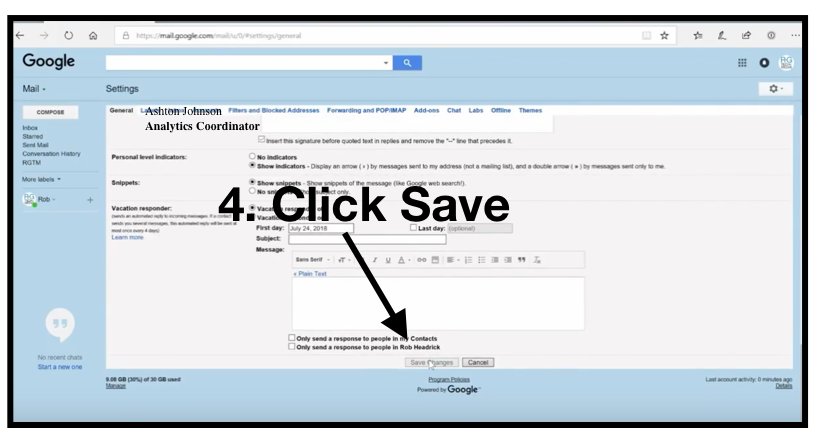
Step Four: At the bottom of the page, click Save Changes.
Wrap Up
There you have it! Easy ways to add a custom signature to today’s most popular email platforms. Plus, as a bonus, all the shortcut keys you need to make sure you’re saving time and being productive each day.
Recent Posts


How can we help?
Whether you need immediate help with an IT issue or want to discuss your long-term IT strategy, our team is here to help.
Call us at (561) 303-2310 or complete the form below and we'll help in any way we can.